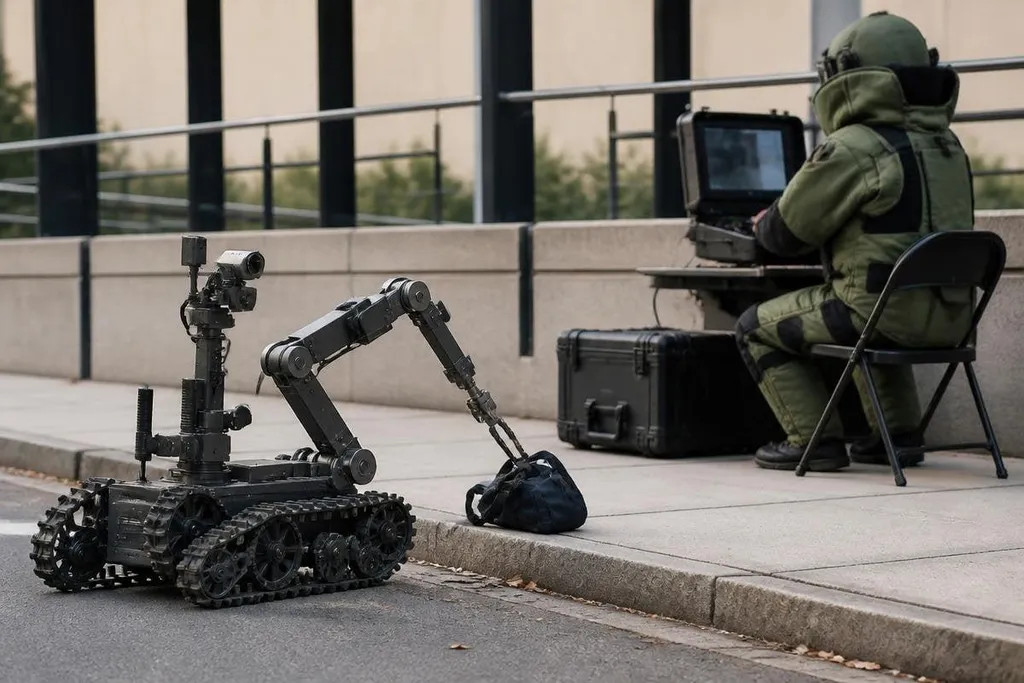
A bomb disposal robot lets a trained technician inspect and handle a suspect device from a safer distance. Its value comes from keeping a person away from the first approach, while its limits begin when the robot meets poor ground, weak signals, or a task its arm cannot complete.
- A camera and remote arm let a technician inspect objects without standing beside them.
- Tracks help the robot cross rough ground, but stairs, rubble, and narrow spaces can stop it.
- The robot reduces exposure to danger; it doesn't decide what a device is or make a scene safe by itself.
How the robot works
Most bomb disposal robots use a tracked base, cameras, lights, and a powered arm. The technician drives the robot from a control station and watches video from cameras mounted near the arm and around the base.
That arm may carry tools for moving an object, cutting a wire, opening a container, or placing a disruptor. A disruptor uses a high-speed impact or water charge to break a suspected device before it can function as intended. The exact tools depend on the robot and the bomb squad's procedures.
The robot's first job is distance. It can move toward a vehicle, package, room, or roadside object while the technician stays away from the blast area.
The cameras also let the team inspect details that would be hard to see from behind a barrier. Remote control matters because radio links can weaken around buildings, vehicles, or other sources of interference.
A lost video feed or delayed control input can turn a careful movement into a bad one, so teams need a recovery plan before the robot moves.
Where it helps
The clearest benefit is lower exposure during inspection. A robot can carry a camera into a position that would force a person to stand close to the object, then give the technician time to study what the camera sees.
It can also move equipment that a person should not approach by hand. That may include a suspect package, a vehicle door, or a container. The robot does not make the decision alone; trained bomb technicians choose the route, tool, and next step.
Some systems can carry sensors or tools for a specific task. Others focus on lifting and moving. This is why a robot's payload, arm reach, camera view, ground clearance, and control range matter more than a broad claim about its role.
A bomb disposal robot may need to work from cover while its camera, radio link, and arm face dust, distance, and uneven ground. Bomb disposal robotics reporting can connect those limits to the test site, date, operator role, and tool used before the next section examines where the system can fail.
Where it can fail
Size can stop the robot at a doorway, while its weight may be too much for a weak floor. Its arm may reach the device but lack the fine control needed to turn a small latch. Tracks can lose grip on loose gravel, wet ground, or steep surfaces.
Power is another limit. A battery that lasts through a short callout may not cover a long search, repeated tool use, and a return trip. Teams need a charging plan, spare batteries, or a second robot when the work area is large.
The control link can fail at the worst moment. Buildings can block radio signals, and metal structures can change how those signals travel. Even a strong arm is hard to use if the operator cannot see or control it.
There is also a human risk. A remote machine can make a dangerous task feel more distant than it is. I'd rather see a squad treat the robot as a way to gain time and distance, not as permission to take more chances.
No robot removes the need for training, protective equipment, scene control, or a plan for what happens after the device is disrupted. The unproven part is often the full result in a messy location, not the arm moving in a clean demonstration.
A practical buying and use checklist
Use these checks before choosing a bomb disposal robot or sending one into a live scene:
- Check the arm: Confirm its reach, lift limit, tool mounts, and ability to work at the angles your team needs.
- Test the route: Run the robot over the steps, gravel, doors, slopes, and floor surfaces found in likely callouts.
- Map the signal: Measure control and video performance around walls, vehicles, tunnels, and metal structures.
- Plan the power: Set a battery time for driving, waiting, tool use, and the return route, then keep a backup plan.
- Train the crew: Practice camera work, arm control, link loss, recovery, and safe shutdown with the actual tools.
- Check support: Confirm spare parts, battery supply, software updates, repair time, and training after delivery.
The right system is the one the squad can control on its worst expected route, with enough battery and a clear response to lost video. A system that works only on flat ground may still help, but its safe operating area needs to be written down before an emergency callout.